
One of the biggest myths in Indian parenting today is that “Robotics is expensive.”
When parents hear the word “Robotics,” they often visualize high-tech labs, expensive imported kits costing ₹15,000, and complicated software. But as we move further into 2026, the truth is much more exciting: You can set up a world-class STEM learning hub on your child’s study desk for less than the cost of a family pizza dinner.
If you are wondering how to build a robotics lab at home for under ₹2,000, this guide will show you exactly how to do it. By following the National Education Policy (NEP 2020) guidelines for hands-on learning, we will help you create a fully functional setup that empowers your child to become a creator.
Table of Contents
1. Why a DIY Lab is Better Than a Ready-Made Kit
While “All-in-One” kits are convenient, they often hide the most important part of learning: how things actually work. When you understand how to build a robotics lab at home, your child gains:
- Granular Understanding: They learn the name and function of every single wire, sensor, and motor.
- Troubleshooting Skills: If a pre-made toy breaks, it’s garbage. If a DIY robot stops, the child learns to check the connections—a vital 2026 career skill.
- Demystifying Tech: They realize that technology isn’t “magic”—it’s just a set of components working together.
Before diving into the hardware, it’s worth reviewing the powerful benefits of robotics for kids to understand the long-term impact of this project.
2. How to Build a Robotics Lab at Home: The Shopping List
To stay under our ₹2,000 budget, we recommend buying components from specialized Indian maker stores instead of general e-commerce giants. Knowing how to build a robotics lab at home starts with sourcing the right “ingredients.”
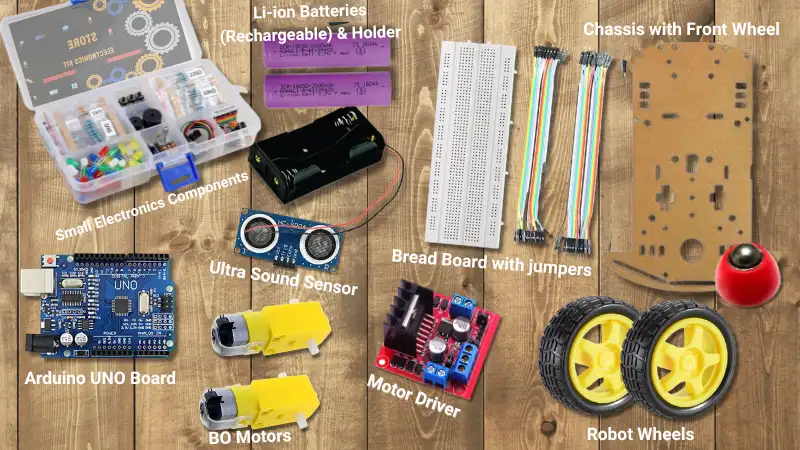
| Component | Function | Approx. Price (INR) |
|---|---|---|
| Arduino Uno (Clone) | The “Brain” that holds the code. | ₹450 |
| 2x BO Motors + Wheels | The “Muscles” that provide movement. | ₹240 |
| L298N Motor Driver | The bridge between the brain and muscles. | ₹180 |
| Ultrasonic Sensor | The “Eyes” that detect obstacles. | ₹85 |
| 2WD Robot Chassis | The “Skeleton” that holds it all together. | ₹250 |
| 18650 Li-ion Batteries (2x) | Reusable, high-power “Energy” source. | ₹300 |
| Battery Holder + Wires | Connects the energy to the system. | ₹150 |
| Breadboard & Jumpers | The “Nervous System” (No soldering required!). | ₹190 |
| Small Component Kit | LEDs, buzzers, and resistors for testing. | ₹150 |
| TOTAL | ₹1,995 |
💡 The “Junk Box” Secret: Saving the Final ₹500
While our shopping list covers the “Brain” and “Muscles,” you don’t need to buy expensive mounting brackets or specialized tools.
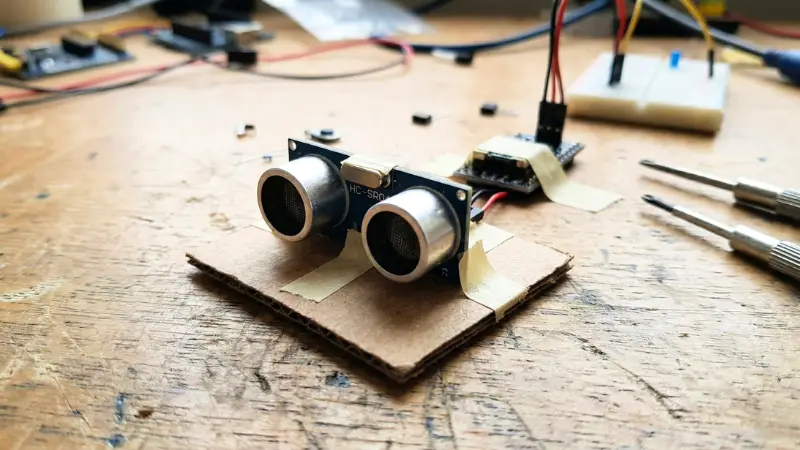
- Cardboard is your best friend: Use an old biscuit box to create a mount for your Ultrasonic sensor.
- Double-sided tape is magic: Instead of struggling with tiny screws, use foam tape to secure your Arduino to the chassis. It acts as an insulator and keeps the build simple.
- Recycle for Style: Encourage your child to use old plastic bottles or tins to build a “body” for their robot. Engineering is about problem-solving with what you have!
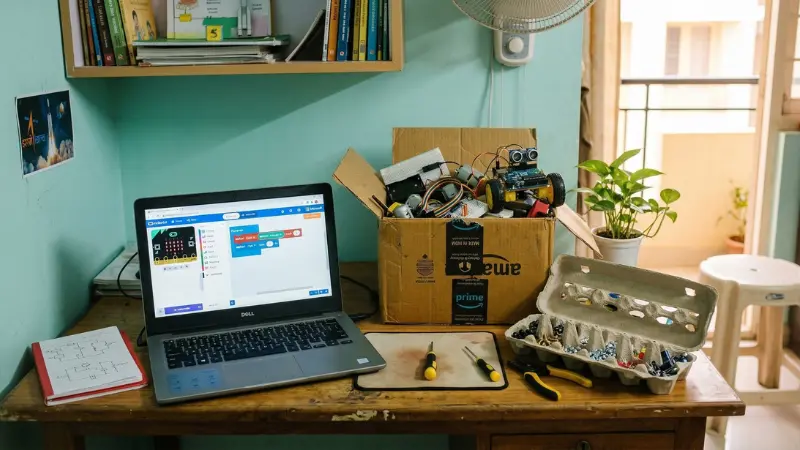
3. Setting Up the “Maker Corner”
You don’t need a spare room. A 3×2 foot corner of a study desk is enough. When considering how to build a robotics lab at home, the physical environment matters as much as the chips.
- The “Cardboard Rule”: Don’t buy expensive mounting brackets. Use old Amazon delivery boxes to create custom mounts for your sensors. It teaches recycling and engineering!
- Organization: Use old plastic food containers or egg cartons to sort your screws, LEDs, and wires.
- The Safety Zone: Ensure the desk is near a power outlet for the laptop, but keep liquids (like water bottles) on a separate table.
4. The 2026 Software Setup: Getting the “Brain” Ready
Building the hardware is only half the battle. Learning how to build a robotics lab at home involves setting up the right digital tools. In 2026, the software landscape for kids has become incredibly user-friendly.
- For Beginners (Ages 8-11): Use PictoBlox. It is an Indian-made platform based on Scratch.
- For Advanced Learners (Ages 12+): Use the Official Arduino IDE 2.0. This is where they will learn real C++ coding.
If you’re unsure whether your child should start with software first, check out our comparison on Robotics vs Coding for kids to decide the best path.
5. Safety First: What Every Parent Needs to Know
Since we are dealing with electricity, safety is paramount. However, how to build a robotics lab at home safely is easy if you follow these rules:
- Voltage Check: This lab operates on 5V to 9V. It is impossible to get an electric shock from these levels.
- Battery Care: We use 18650 Li-ion batteries because they are powerful. Ensure your child never leaves them charging overnight.
- The “No-Smoke” Rule: Always double-check your wiring before plugging in the battery.
6. The “No-Solder” Secret
The most common fear parents have is using a hot soldering iron. A key part of how to build a robotics lab at home for kids is using Jumper Wires and Breadboards.
- These allow your child to “plug and play” connections like building blocks.
- If they make a mistake, they simply unplug the wire and try again.
- It makes learning 10x faster and 100% safer for kids aged 8-14.
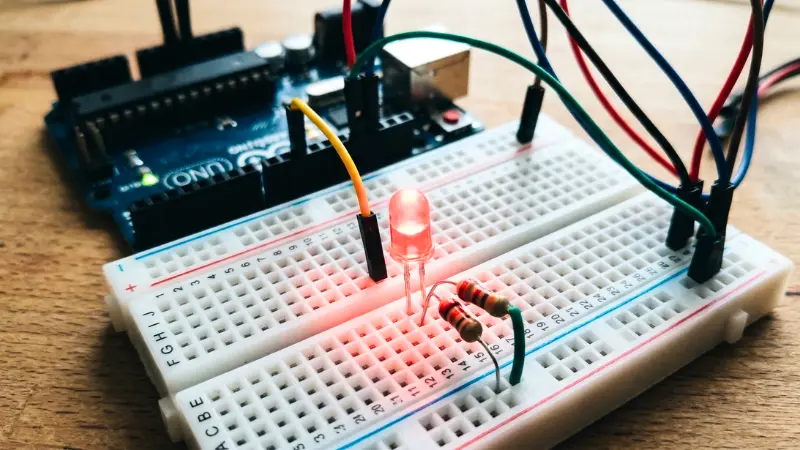
7. Your First 30-Minute Project: The “Blinking Eye”
Before building a moving robot, start small. This is the first practical lesson in how to build a robotics lab at home. Use the Arduino and one LED from your kit.
- Goal: Write 5 lines of code to make the LED blink.
- The Lesson: This teaches the child how to “upload” a thought from their brain (code) to a physical object (the LED).
8. Where to Buy: Trusted Indian Stores
In 2026, these are the most reliable stores for parents researching how to build a robotics lab at home:
- Robu.in: Known for the best inventory and technical support in India.
- MakerBazar.in: Excellent for low-cost “clones” and DIY bits.
- Local Markets: If you live in a metro, visit Lamington Road (Mumbai) or SP Road (Bangalore).
9. Maintenance: Keeping Your Lab Running Smoothly
Teach your child these maintenance habits to ensure their investment lasts. After learning how to build a robotics lab at home, they must learn to care for it:
- Sensor Cleaning: Dust is the enemy of the Ultrasonic sensor. A gentle wipe with a dry cloth once a week ensures the robot “sees” clearly.
- Wire Management: Use small rubber bands to keep wires tidy.
- Battery Storage: Remove the 18650 batteries if the lab isn’t being used for more than a week.
10. Future Roadmap: What Can They Build Next?
Once you have mastered the basics of how to build a robotics lab at home, the possibilities are endless. These components form the foundation of our comprehensive Robotics STEM education guide. Using these exact components, your child can eventually build:
- An Obstacle Avoider Robot: A car that never hits a wall.
- A Smart Plant Waterer: A system that beeps when your home plants are thirsty.
- A Remote-Controlled Car: Using a smartphone to drive their creation.
11. Frequently Asked Questions (FAQ) for Parents
Q: Does my child need an expensive laptop for this?
Ans: No. Any laptop from the last 10 years that can run a web browser is powerful enough.
Q: Is it okay if we buy a pre-made chassis?
Ans: Absolutely. A ₹250 acrylic chassis provides a more stable base for wheels and motors.
Q:Where can I find the absolute best guide for how to build a robotics lab at home?
Ans: You are reading it! This guide is updated for 2026 standards and Indian component pricing.
12. Conclusion: The Gift of “I Can Build That”
When your child builds their first device using this ₹2,000 lab, something changes. They stop looking at drones as “toys” and start looking at them as “systems they can understand.”
Understanding how to build a robotics lab at home is the first step in shifting from a “Rote Learning” mindset to a “Maker” mindset. In the era of NEP 2020, this is the most valuable gift you can give them for the future.
Stay tuned for our next post, where we provide the step-by-step wiring guide for your very first robot!

Samir Sen is a retired Indian Railways Signalling Engineer with over 30 years of experience in railway signalling systems and safety operations. He also served as a faculty member at a Zonal Signalling Training Institute of Indian Railways, delivering theoretical and practical training in signal engineering. Through SSEN Techno, he simplifies robotics and STEM education for learners and beginners.